
| 일 | 월 | 화 | 수 | 목 | 금 | 토 |
|---|---|---|---|---|---|---|
| 1 | 2 | 3 | 4 | 5 | ||
| 6 | 7 | 8 | 9 | 10 | 11 | 12 |
| 13 | 14 | 15 | 16 | 17 | 18 | 19 |
| 20 | 21 | 22 | 23 | 24 | 25 | 26 |
| 27 | 28 | 29 | 30 |
- 동적프로그래밍
- react
- EC2
- 완전탐색
- 서버구축
- sort
- Algorithm
- 정렬
- java
- 라우터
- 토이프로젝트
- 스터디
- 다익스트라 알고리즘
- Spring Boot
- mysql
- 탐욕법
- 알고리즘
- 백준알고리즘
- nodejs
- Router
- 리액트
- 브루트포스
- AWS
- BFS
- url parsing
- ELB
- EventListener
- spring
- 백준
- 자료구조
- Today
- Total
공부하는 블로그
Spring | Eclipse에서 Spring 프로젝트 생성하기 본문
SpringFramework를 사용하기 위한 프로젝트를 Eclipse를 이용하여 생성해보자.

가장 먼저 Dynamic Web Project를 생성하도록 하자.
프로젝트명을 입력하고 Finish
서버 런타임은 아파치 톰캣 8을 이용한다.
Apache Tomcat® - Apache Tomcat 8 Software Downloads
Welcome to the Apache Tomcat® 8.x software download page. This page provides download links for obtaining the latest versions of Tomcat 8.x software, as well as links to the archives of older releases. Unsure which version you need? Specification versions
tomcat.apache.org
위의 사이트에서 core - zip 파일을 다운로드 받아 사용하자.

Window - Preference - Server - Runtime Environment에서 서버 런타임 환경을 추가하도록 하자.
아파치 톰캣 v8.5를 선택하고 다운로드 받은 아파치 톰캣 파일을 불러온다.
추가된 서버 런타임을 적용하자.
생성된 프로젝트를 메이븐 프로젝트로 변환하여 pom.xml을 생성하도록 하자.
프로젝트파일 오른쪽 클릭 - Configure - Convert to Maven Project
pom.xml이 생성되었다.
Maven은 프로젝트 설정이 XML 태그로 기술되어 있는 pom.xml 이라는 빌드파일을 사용한다. dependencies 태그를 이용하여 Maven 저장소에 저장된 라이브러리를 불러와 사용할 수 있으며 properties 태그를 이용하여 사용자 변수를 설정해줄 수 있다.
Maven Repository: Search/Browse/Explore
The AWS Java SDK for Amazon Kinesis module holds the client classes that are used for communicating with Amazon Kinesis Service Last Release on Jun 24, 2020
mvnrepository.com
<project xmlns="http://maven.apache.org/POM/4.0.0"
	xmlns:xsi="http://www.w3.org/2001/XMLSchema-instance"
	xsi:schemaLocation="http://maven.apache.org/POM/4.0.0 http://maven.apache.org/xsd/maven-4.0.0.xsd">
	<modelVersion>4.0.0</modelVersion>
	<groupId>SpringTest</groupId>
	<artifactId>SpringTest</artifactId>
	<version>0.0.1-SNAPSHOT</version>
	<packaging>war</packaging>
	<build>
		<sourceDirectory>src</sourceDirectory>
		<plugins>
			<plugin>
				<artifactId>maven-compiler-plugin</artifactId>
				<version>3.8.0</version>
				<configuration>
					<source>1.8</source>
					<target>1.8</target>
				</configuration>
			</plugin>
			<plugin>
				<artifactId>maven-war-plugin</artifactId>
				<version>3.2.1</version>
				<configuration>
					<warSourceDirectory>WebContent</warSourceDirectory>
				</configuration>
			</plugin>
		</plugins>
	</build>

	<!-- 사용자 변수 설정 -->
	<properties>
		<org.springframework-version>5.2.6.RELEASE</org.springframework-version>
	</properties>

	<!-- Maven Dependency 추가 -->
	<dependencies>
		<!-- https://mvnrepository.com/artifact/org.springframework/spring-context -->
		<dependency>
			<groupId>org.springframework</groupId>
			<artifactId>spring-context</artifactId>
			<version>${org.springframework-version}</version>
		</dependency>
		<!-- https://mvnrepository.com/artifact/org.springframework/spring-web -->
		<dependency>
		    <groupId>org.springframework</groupId>
		    <artifactId>spring-web</artifactId>
		    <version>${org.springframework-version}</version>
		</dependency>
		<!-- https://mvnrepository.com/artifact/org.springframework/spring-webmvc -->
		<dependency>
		    <groupId>org.springframework</groupId>
		    <artifactId>spring-webmvc</artifactId>
		    <version>${org.springframework-version}</version>
		</dependency>
	</dependencies>

</project>
스프링 버전관리를 위해 org.spirngframework-version이라는 사용자 변수를 따로 지정해주고 스프링프레임워크를 사용하기 위한 라이브러리를 dependencies에 추가해준 기본 코드이다.
다음은 web.xml을 생성하여 웹 어플리케이션을 설정해보도록 하자.
프로젝트 마우스 오른쪽 클릭 - Java EE Tools - Generate Deployment Descriptor Stub
프로젝트/WebContent/WEB-INF에 web.xml 파일이 생성되었다.
web.xml은 WAS(Apache Tomcat)에서 사용할 웹 어플리케이션의 기본 설정을 정의한다. DispatcherServlet의 경로를 맵핑해주며 필터를 이용하여 인코딩 등을 할 수 있다.
<?xml version="1.0" encoding="UTF-8"?>
<web-app xmlns:xsi="http://www.w3.org/2001/XMLSchema-instance" xmlns="http://java.sun.com/xml/ns/javaee" xsi:schemaLocation="http://java.sun.com/xml/ns/javaee http://java.sun.com/xml/ns/javaee/web-app_3_0.xsd" version="3.0">
  <display-name>SpringTest</display-name>
  <welcome-file-list>
    <welcome-file>index.html</welcome-file>
    <welcome-file>index.htm</welcome-file>
    <welcome-file>index.jsp</welcome-file>
  </welcome-file-list>

  <!-- 웹 애플리케이션의 최상단에 위치하는 Context 지정 -->
  <context-param>
    <param-name>contextConfigLocation</param-name>
    <param-value>/WEB-INF/spring/applicationContext.xml</param-value>
  </context-param>

  <!-- DispatcherServlet 경로 Setting -->
  <servlet>
  	<servlet-name>dispatcherServlet</servlet-name>
  	<servlet-class>
  		org.springframework.web.servlet.DispatcherServlet
  	</servlet-class>
  	<!-- contextLoader가 해당 위치의 설정 파일을 읽어, 해당 파일을 dispatcher servlet으로 만든다. -->
  	<init-param>
  		<param-name>contextConfigLocation</param-name>
  		<param-value>
  			/WEB-INF/spring/servlet-context.xml
  		</param-value>
  	</init-param>
  	<load-on-startup>1</load-on-startup>
  </servlet>

  <!-- url mapping -->
  <servlet-mapping>
	<servlet-name>dispatcherServlet</servlet-name>
	<url-pattern>*.do</url-pattern>
  </servlet-mapping>

  <!-- Listener Setting -->
  <listener>
  	<listener-class>org.springframework.web.context.ContextLoaderListener</listener-class>
  </listener>

  <!-- 한글 Setting -->
  <filter>
  	<filter-name>encodingFilter</filter-name>
  	<filter-class>org.springframework.web.filter.CharacterEncodingFilter</filter-class>

  	<init-param>
  		<param-name>encoding</param-name>	<!-- UTF-8 적용 -->
  		<param-value>UTF-8</param-value>
  	</init-param>

  	<init-param>
  		<param-name>forceEncoding</param-name>	<!-- 더욱 강력한 셋팅 -->
  		<param-value>true</param-value>
  	</init-param>
  </filter>

  <filter-mapping>
  	<filter-name>encodingFilter</filter-name>
  	<url-pattern>/*</url-pattern>	<!-- 모든 파일에 필터 적용 -->
  </filter-mapping>

</web-app>
DispatcherServlet 객체를 생성하여 경로를 설정해주고 URL을 맵핑해준 web.xml의 기본 코드이다. 필터를 사용하여 UTF-8로 인코딩 해주었다.
<welcome-file> : 루트경로를 통해 접근할 때 나타낼 파일을 설정. 우선순위 순으로 태그를 작성한다.
<servlet-name> : 서블릿의 이름을 설정. 맵핑 설정에서의 servlet-name은 반드시 같아야한다.
<servlet-class> : 실제 서블릿 클래스. 패키지까지 정확하게 기술해야 한다.
<url-pattern> : 클라이언트가 요청할 URL 패턴을 설정.
생성된 DispatcherServlet 객체는 프로젝트/WebContent/WEB-INF/spring/servlet-context.xml을 참조하게 된다.
이제 참조될 servlet-context.xml과 애플리케이션의 최상단에 위치하는 applicationContext.xml을 생성하도록 하자.
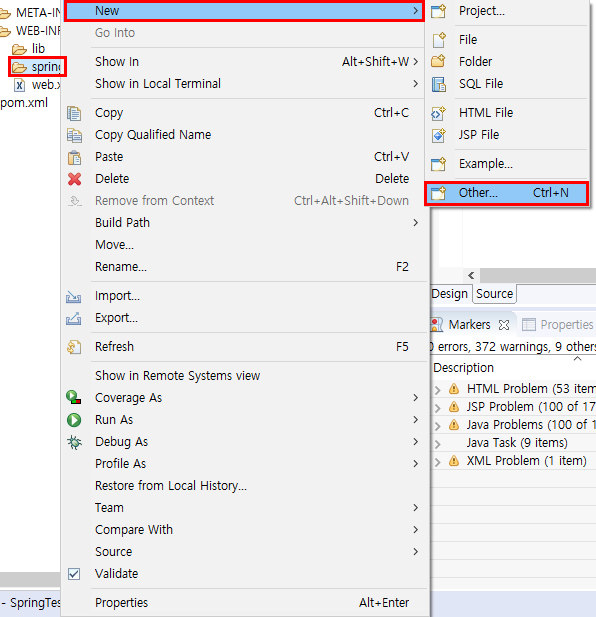
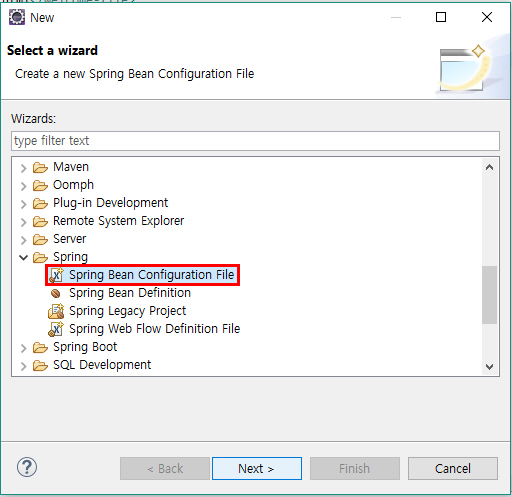
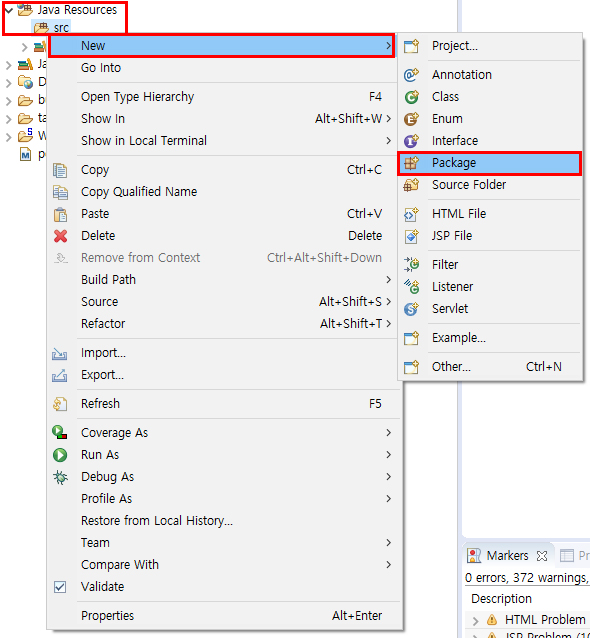
WEB-INF의 하위 폴더로 spring을 생성 - spring 오른쪽 클릭 - New - Other - Spring Bean Configuration File
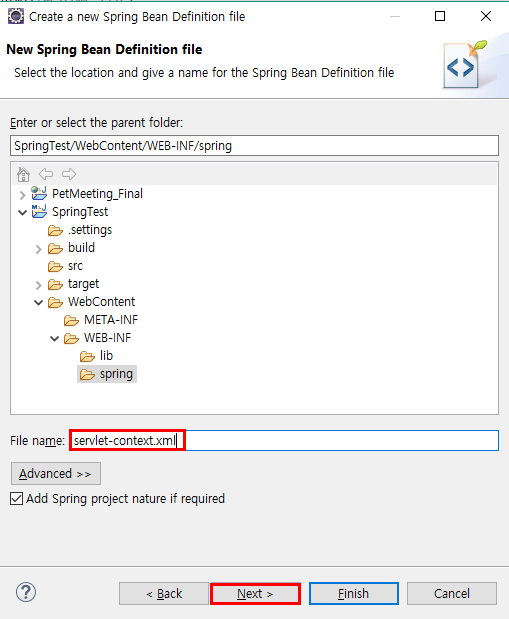
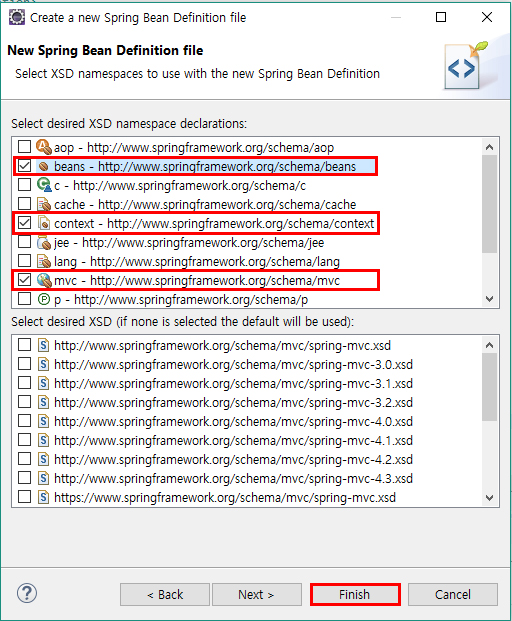
파일명은 servlet-context.xml로 설정 - Next - namespace 선택 (beans, context, mvc) - Finish.
applicationContext.xml도 위와 같은 방법으로 생성한다.
applicationContext.xml은 서로 다른 여러 서블릿에서 공유해서 사용하는 공통 기능에 대한 Bean을 선언한다. 예를 들면 DB나 Service에 대한 Bean이 있다. 이 곳에 대한 설정은 DB를 연동할 때 알아보도록 하고 생성된 파일을 우선은 그대로 두자.
servlet-context.xml 파일에서는 어노테이션을 활성화시키고 View의 경로 및 확장자, java 공통 패키지를 설정한다.
<?xml version="1.0" encoding="UTF-8"?>
<beans xmlns="http://www.springframework.org/schema/beans"
	xmlns:xsi="http://www.w3.org/2001/XMLSchema-instance"
	xmlns:context="http://www.springframework.org/schema/context"
	xmlns:mvc="http://www.springframework.org/schema/mvc"
	xsi:schemaLocation="http://www.springframework.org/schema/beans http://www.springframework.org/schema/beans/spring-beans.xsd
		http://www.springframework.org/schema/context http://www.springframework.org/schema/context/spring-context-4.3.xsd
		http://www.springframework.org/schema/mvc http://www.springframework.org/schema/mvc/spring-mvc-4.3.xsd">

	<!-- 어노테이션 활성화 -->
	<context:annotation-config />

	<!-- View 경로 및 확장자 설정 -->
	<bean id="viewResolver"
		class="org.springframework.web.servlet.view.InternalResourceViewResolver">
		<property name="prefix" value="/WEB-INF/views/" />
		<property name="suffix" value=".jsp" />
	</bean>

	<!-- java 공통 패키지 설정 -->
	<context:component-scan base-package="com.spring.test" />

</beans>
servlet-context.xml의 기본 코드이다. 뷰는 /WEB-INF/views/의 경로에 .jsp 형식으로 생성해야 하며 자바 공통 패키지는 com.spring.text로 설정해주었다.
이제 기본 설정은 끝났으니 Controller와 View를 생성하여 서버가 제대로 실행하는지 확인해보자.
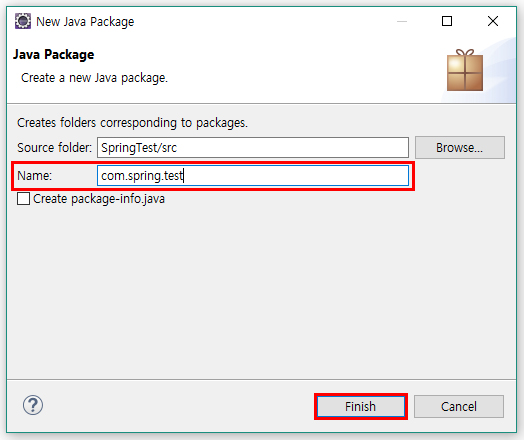
자바 소스들이 저장되는 /Java Resources/src 경로에 공통 패키지를 생성해주자. 공통 패키지명은 servlet-context.xml에서 설정해준 그대로 사용해야 한다.
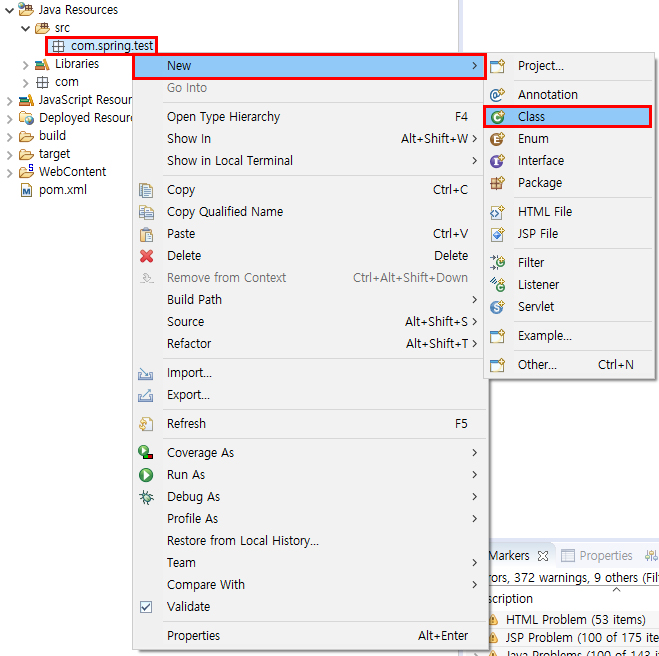

생성된 패키지에 Controller를 만들어준다. 이름은 HomeController라고 해주었다.
package com.spring.test;

import org.springframework.stereotype.Controller;
import org.springframework.web.bind.annotation.RequestMapping;
import org.springframework.web.bind.annotation.RequestMethod;

@Controller
public class HomeController {

	@RequestMapping(value = "home.do", method= {RequestMethod.GET, RequestMethod.POST})
	public String home() {
		return "home";
	}

}
컨트롤러의 기본 코드이다. 클래스를 선언하는 부분 바로 위에 @Controller 어노테이션을 이용하여 컨트롤러임을 명시해주었다. 이를 통해 스프링 컨테이너에서는 알아서 HomeController 클래스를 컨트롤러로 인식할 것이다.
클래스 내의 메소드 위에는 @RequestMapping 어노테이션을 이용하여 url을 맵핑해주자. value에는 URL이, method에는 http 요청방식이 지정된다. URL은 web.xml에서 지정해준 URL 패턴을 따라야한다.
메소드의 return 값은 String으로 맵핑해준 URL로 요청이 들어오면 해당 문자열을 파일명으로 가진 view를 반환한다.

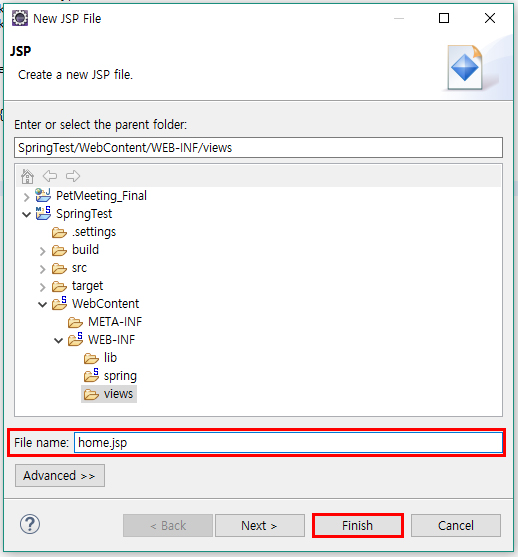
컨트롤러에서 요청받은 뷰를 정상적으로 반환하기 위해서 jsp 파일을 생성해보자. servlet-context.xml에서 설정해준 경로(/WEB-INF/view)에 파일을 생성하도록 하자.
<%@ page language="java" contentType="text/html; charset=EUC-KR"
    pageEncoding="EUC-KR"%>
<!DOCTYPE html>
<html>
<head>
<meta charset="EUC-KR">
<title>HOME</title>
</head>
<body>
	<h1>HI! SPRING!</h1>
</body>
</html>
이제 Ctrl + Alt + R을 눌러 서버를 실행시킨 후 웹 브라우저에서 home.jsp 파일을 요청해보자.
http://localhost:8090/프로젝트명/컨트롤러 URL ---- http://localhost:8090/SpringTest/home.do
위와 같이 페이지가 정상적으로 띄워지면 프로젝트 생성이 성공한 것이다!
Reference
· web.xml 설정 내용, 역할 및 간단한 예시 이해하기 - https://gmlwjd9405.github.io/2018/10/29/web-application-structure.html
· Spring - home.jsp 구동 과정 - https://doublesprogramming.tistory.com/84
· Application-Context 와 Servlet-Context - https://jaehun2841.github.io/2018/10/21/2018-10-21-spring-context/#%EB%93%A4%EC%96%B4%EA%B0%80%EB%A9%B0
'Spring > Spring Framework' 카테고리의 다른 글
| Spring | Introduction (0) | 2020.05.12 |
|---|
